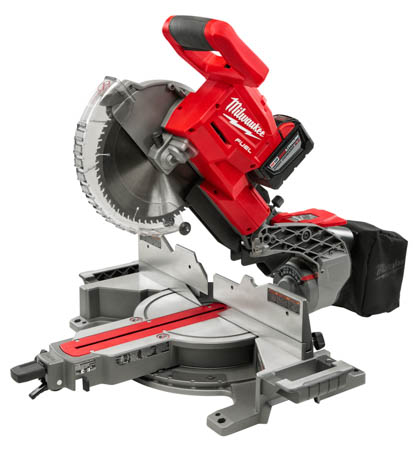
 It was June of 2015 when we were first allowed a peek at the prototype of the M18 Fuel miter saw at the 2015 New Product Symposium. Photos were not allowed, nor any sampling of the tool, but we were impressed to see it cut a 5/4 x 12 fir stair tread with ease. Then we waited. We waited a year before we could try it at NPS16. All were again impressed although a few criticisms surfaced, and we waited some more. Now, in early September of 2016, we have our hands on the production saws and are trying them out in our own shops.
The first impression when unboxing these are that they are very light. At 45 lb., they are 10 to 20 lb. lighter than many corded saws of their capacity. The side handles make them a breeze to carry, enhancing the mobility that is one of the great benefits of a cordless tool. With everything locked down for transport, the saw is well balanced and easy to carry, not at all awkward like the last couple of miter saws I’ve owned. The light weight that makes it easy to carry also allows it to slide around on whatever it’s sitting on, so clamps, bolts or a dedicated stand are advisable.
My first cuts were to 1 x 6 t&g pine, 2 x 10 spruce, 1 x 10 yellow pine flooring and 3½” poplar crown molding. The cuts were square, mitered, beveled and compound miters, and every one tracked straight and true. I’ll admit that I expected trouble that never materialized. Read on to see why.
Before firing up the saw I brought it into the living room (!) to look it over. I was immediately concerned with the force needed to push the saw head down against the spring. It’s much stiffer than any miter or chop saw I have used. I then tried all the various controls and found them as smooth and positive as they were on the demonstration saws at NPS16. Next I slid the saw on the rails and found it a little too eager to zoom to the full rear position. I’d like a just a little resistance there. I find that the combination of a stiff spring, a pivot point well aft of the motor and easy gliding rails means that when I push the saw head down, it wants to scoot to the rear even if that’s not my intention. This effect seems more pronounced when the saw is situated on a bench relatively high to the user.
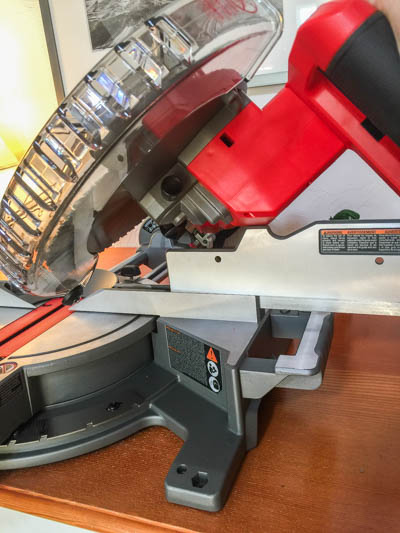 More Living Room Observations
Looking over the saw, I found a couple of other characteristics that concerned me. Foremost was the need to remove the fences for most bevel operations. This is apparently not new to everyone, but a surprise to me, as I have my current saw set up with wooden fences that never need shifting or removal. I’d be happy to do that with the Milwaukee saw too, but the mounting holes are in the pieces that come off, not the ones that stay on! The truth of the matter is that bevel cuts are usually made with the material on the flat anyway, so the the lack of a tall fence is not critical, but I would prefer not to add another step (the removal) to the work flow.
Another concern was the flex in the rails and bevel arm. With the saw head in the raised position, I could deflect it ⅜”. It was easily deflected with just one finger. I didn’t see how it could possibly cut straight, but multiple bevel cuts and compound miter cuts never yielded a single wobbly cut. It seems that the flex exists with the saw head in the high position, but when the saw is lowered, it drops to near zero. This leaves the possibility of deflection when cutting a tall workpiece on edge, but even that deflection never happened in the initial testing unless I caused it intentionally.
 Making Sawdust
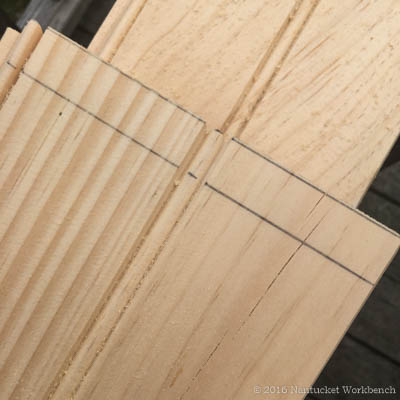
I had a considerable pile of pine boards on hand, so I squared a series of marks on several and cut them at 45°. After 15 or more cuts, I could see that not a single one showed any wandering or deflection. In the accompanying photo, I left a little daylight to the right of the cut line to show the accuracy of the bevel cut. Pairs of 45° cuts made good 90° corners of the 1×6 with no gaps. I tried the same on the 1×10 with similar success.
 Next was a compound miter on the crown molding so I could cope it for an inside corner. Once again the cut was true and the pieces fit together admirably.
Knobs, Levers and Switches
I must say that I like the controls and adjusters on this saw. They are a step up from the last three saws that I have owned, all working smoothly. I like the detents included in the bevel adjustment, new to me, but I like the detent overrides in the bevel and miter adjustments even more.
 An annoying characteristic of my current saw is its insistence on dropping into a detent when I want to set an angle close to a preset, but not actually on it. With Milwaukee’s detent overrides, the angles can be set anywhere on the scale without interference.
The large tab in the photo is the miter lock lever. Under it is the detent lever. Pulling up on the detent lever frees the saw to move through the miter range. Pushing down on the miter lock lever secures it in place. The knob on the left is the detent override knob. Rolling it back 90° locks the detent lever in the up position, allowing complete freedom of movement without unwanted influence from the detents. It’s spring-loaded, so pulling up on the detent lever returns the knob to the off position.
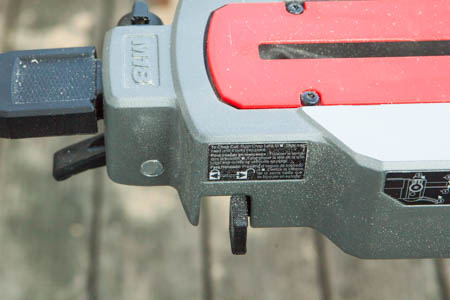
On the other side is the chop lock. Pulling back on this tab will lock the rails in a set position for chop sawing without the saw head sliding back and forth.
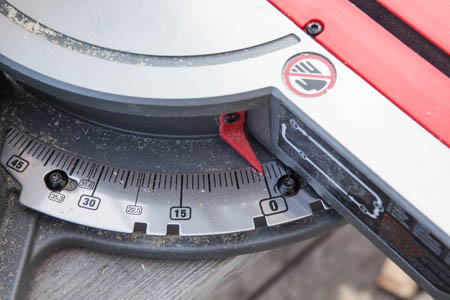 The miter detents are built into the miter angle scale. This makes it an easy matter to insure that the saw is set square to the fence at the 0° setting. Loosening five screws allows the saw blade to be set to a square.
 The bevel adjustment lever releases the saw head to move through the range of bevel angles. There are two positions in addition to the lock. Pulled all the way toward the user, it allows the saw head to pivot from side to side. Released to its half way position, it engaged the detents to allow quick selection of commonly used bevel angles. I see that I need to develop the habit of using the lock once I’ve selected a detent. I have several times left the lever in the half way position. While it seems to work that way, it’s not what’s intended.
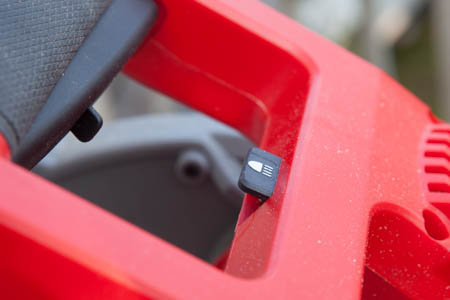 The switch for the cut line indicator is within the D-handle. A trifle awkward for me but of little consequence. I would like to see the light stay on a bit longer while I’m setting up for a cut.
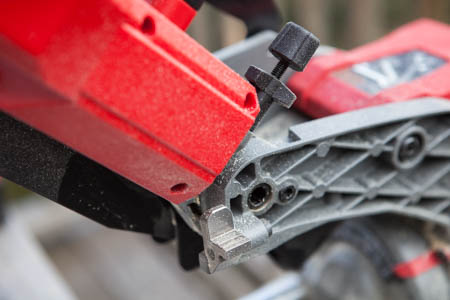 Here’s a feature I know I’m going to like! The depth stop can be rotated out of the way for making full depth cuts without resetting the depth adjustment screw. That plated foot in the lower part of the photo can be turned 90° to catch the depth adjustment screw or let it pass by.
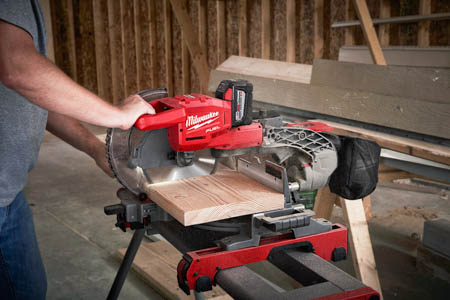 The M18 Fuel Miter Saw has shown well in these preliminary tests, so I’m expecting good performance when I put it to work in the shop. I’ll add the results of an extended trial as soon as I’ve done a job or two with it.
Mostly Hits, A Couple of Misses
While there’s a lot to like with this saw, there are a few things that are less than ideal. The heavy spring tension might be something I get used to. Time will tell. Having to remove the fences to do bevels and compound miters is a pain and disrupts work flow, but is not uncommon among other brands as well. Cutting crown against the fence using crown stops is an option that allows the retention of the fences, but many of us prefer to cut crown on the flat using the preset angles provided. Then there is the dust collection. I can attest to the fact that some of the sawdust did make it into the bag, but I think that this saw features dust distribution rather than dust collection. After just one cut it was dusted on every side. Given that I think that dust collection is the biggest advance in power tools in the last few years, more important than viable cordless tools, it’s a big miss for me. I’ll be looking into some modifications to see if I can improve it.
While waiting for this saw I was sure that I would like it a lot. When I first set it up, I thought I would not like it at all. When I actually used it, I found that I do indeed like it quite a bit, enough to make it the first line saw that I will use as long as it performs as well as the testing indicates.
-dvl


Aaron,
I’m sorry to have neglected this page! I’ll post some further thoughts in the next few days.
Dirck
Hey can we get an update on your experience with this saw? This is honestly the best review I’ve read. Doesn’t sound like you’re paid to praise the saw. I was interested in the m18 miter saw until I discovered its limitations and decided to go with the flexvolt dhs716ab from dewalt. I am heavily invested in the m18 platform but it still didn’t convince me to buy this saw. When I go to Home Depot and test the demo unit I notice it’s quite sloppy and some parts are broken. Not a good sign for something I’ll use every day. What are your thoughts on this saw after some use?